Friday, 17 July 2009
Photo Editing: Frame-ups and Special Effects - Day 12
Day 12 was all about a technique for framing up a set of photos into a storyboard. Jessica showed how to create a three-panel storyboard, including adding some text at the bottom.
Thursday, 16 July 2009
Photo Editing: Frame-ups and Special Effects - Day 10 & 11
I had a busy day yesterday and so didn't get around to doing day 10's lesson until today.
The lesson for day 10 was a culmination of all we had learned so far. We learned how to create our own clipping mask from a shape, then add in our photo, two textures, a type overlay, some type in two fonts, and then finish it off with an edge burning technique. Phew ....... lots to do.
I've only had time to try this with one photo.
Before

After
The lesson for day 10 was a culmination of all we had learned so far. We learned how to create our own clipping mask from a shape, then add in our photo, two textures, a type overlay, some type in two fonts, and then finish it off with an edge burning technique. Phew ....... lots to do.
I've only had time to try this with one photo.
Before

After
Tuesday, 14 July 2009
Photo Editing: Frame-ups and Special Effects - Day 9
Lesson 9 of Jessica Sragues Photo Editing: Frame-ups and Special Effects online course was all about edge burning - darkening the edges of a photo, while leaving the center of the photo light. The darkened edges are supposed to pull the viewer's eye subtly toward the center of our photo.
I'm not sure if the effect on my photos is too subtle though because you can't really see the difference!
Before
After
Before
After
Before
After
Monday, 13 July 2009
Photo Editing: Frame-ups and Special Effects - Day 8
Lesson 8 was all about how to use type on your photos in interesting ways. I was particularly pleased that this was todays theme because I've been trying unsuccessfully to put wording on photos in PSE for sometime, so to finally learn how to do it was great. Here's my efforts. They aren't brilliant - I probably should have taken more time to decide what wording and which fonts to use but having now learned the basics I think I will be able to experiment with the technique further in the future.
Saturday, 11 July 2009
Photo Editing: Frame-ups and Special Effects - Day 6
Todays lesson introduced a concept in photography circles, called "Through the Viewfinder". To get a worn, faded look, photographers will actually take photographs through the viewfinder of an old camera. The result is a photo with blackened edges, distortion, scuffs and scratches and marks. Todays challenge was to create an image using "Fake TTV" textures and then also add one or more techniques from the previous lessons (png word art, brushes, additional texture).
Here's what I came up with. Really enjoyed this today.


Here's what I came up with. Really enjoyed this today.


Friday, 10 July 2009
Mojo Holder Challenge #117
Tonight is Mojo Holder Challenge night. Challenge #117 was to lift a layout by Pearl Liu. Pearl lives in Singapore and designs for Di Hickman's Card Sketches and Such Sweet Tierney ( on Etsy ).
Here's Pearls layout, followed by mine.
Photo Editing: Frame-ups and Special Effects - Day 5
Todays lesson was all about adding texture to a photo and also combining the previous techniques of adding frames and clipping masks.
Here are todays edited photos


Jessica did suggest not using "smiling at the camera closeup portraits" for this technique, and after using such a photo (last one above) I can see why. I don't think the result is particularly good, so I've learned from my mistake.
Here are todays edited photos


Jessica did suggest not using "smiling at the camera closeup portraits" for this technique, and after using such a photo (last one above) I can see why. I don't think the result is particularly good, so I've learned from my mistake.
Thursday, 9 July 2009
Photo Editing: Frame-ups and Special Effects - Day 4
Lesson 4 was a nice easy one - Clipping Masks. A clipping mask is basically a shape - any shape - that you can "clip" your photo onto, to cause your photo to conform itself to that shape. For the course we used a rectangular clipping mask with scuffed-up edges, so the photo takes on a worn, aged appearance. Here's my effort.
Wednesday, 8 July 2009
Photo Editing: Frame-ups and Special Effects - Day 3
Todays lesson was all about a technique you can use to create a cool hand-tinted special effect for photos you'd like to add a soft, antique feel to. It was about Adjustment layers and Blending Modes. I had never head of these before doing the course.


As well as adding an antique effect to photos the projects also built on the previous days lessons and included adding a frame and where appropriate some soft glowy stars with a brush.
Here's some of my photos before and after. The photos probably weren't the best for this lesson but I liked the effect anyway.


Tuesday, 7 July 2009
Photo Editing: Frame-ups and Special Effects - Day 2
Todays lesson was all about using brushes. The only brushes I've ever used have been to brush my hair with or occasionally the floor! LOL. My finished photo.

Nothing spectacular but the video tutorials are so easy to understand that I'm really chuffed that I managed this. I keep thinking of all sorts of possibilities and ways of using brushes on my photos in the future. I'm really enjoying the course and finding it surprisingly easy.


Nothing spectacular but the video tutorials are so easy to understand that I'm really chuffed that I managed this. I keep thinking of all sorts of possibilities and ways of using brushes on my photos in the future. I'm really enjoying the course and finding it surprisingly easy.
I then found some more brushes on the the net and had a play around and came up with these


Monday, 6 July 2009
Photo Editing: Frame-ups and Special Effects - Day 1
A few weeks ago I signed up for one of Jessica Sprague's online courses. Today her course entitled "Photo Editing: Frame-ups and Special Effects" began. The two week course promises to show how to use cool Photoshop techniques such as brushes, masks, frames, and special effects with layers and if the first lesson is anything to go by I'm going to enjoy it.
Todays lesson was all about adding PNG frames and word art to photos. Having been shown in the video tutorial how to do this, I can't believe how easy it is and I will certainly be doing this more in the future. This was my first effort using the free frames and word art supplied as part of the course. I know the colours probably aren't ideal for the colours of my photo but as a first attempt I'm happy with it.
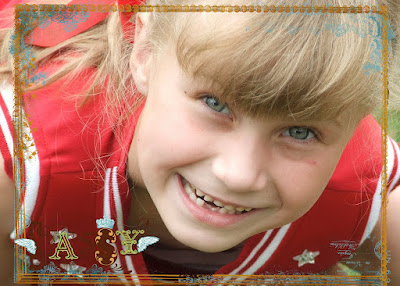
And then I thought I would have a go with some of the digital frames I already had. I had downloaded some previously from various online stores but never really got to grips with them and on the odd occasion I had used them I had printed them onto a trasparency and used them as an overlay on my photos. So much easier to actually add them to the photo before printing.
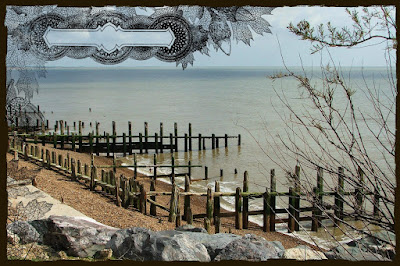
Todays lesson was all about adding PNG frames and word art to photos. Having been shown in the video tutorial how to do this, I can't believe how easy it is and I will certainly be doing this more in the future. This was my first effort using the free frames and word art supplied as part of the course. I know the colours probably aren't ideal for the colours of my photo but as a first attempt I'm happy with it.

And then I thought I would have a go with some of the digital frames I already had. I had downloaded some previously from various online stores but never really got to grips with them and on the odd occasion I had used them I had printed them onto a trasparency and used them as an overlay on my photos. So much easier to actually add them to the photo before printing.

Friday, 3 July 2009
Hello Blog
Sorry! I have neglected my blog lately. I can't believe three challenges have been posted on Mojo Holder since I last updated this blog.
On 19th June the team lifted a layout by Laura Price Fiore. Laura's layout was Christmas themed whilst mine used photos of Lara messing around with my old guitar. Here's Laura's layout, followed by mine.
On 26th June, Nancy van den Berg kindly let us use one of her layouts. My friend Lynn first showed me some of Nancy's layouts and ever since I have been a huge fan and have followed her blog for sometime. He layout was a gorgeous baby themed layout. Mine used photos once again of Lara, this time in the snow.
And finally, tonight the design team lifted a layout by Edleen Maryam. Edleen's layout was lovely but I really struggled to come up with a layout this week. I left it far too late in the week to create my layout but after going to the dentist on Monday and having to have a tooth out , I really didn't feel up to scrapping for a few days. Then the hot, hot, HOT weather we have had this week hasn't helped. With temperatures in the upper 20 degrees I think my Mojo became dehydrated, or maybe it decided to go somewhere cooler. Eventually I managed to put together a layout this morning. I'm not that pleased with it but perhaps it will grow on me.
Here's Edleen's layout, followed by mine.
On 19th June the team lifted a layout by Laura Price Fiore. Laura's layout was Christmas themed whilst mine used photos of Lara messing around with my old guitar. Here's Laura's layout, followed by mine.
On 26th June, Nancy van den Berg kindly let us use one of her layouts. My friend Lynn first showed me some of Nancy's layouts and ever since I have been a huge fan and have followed her blog for sometime. He layout was a gorgeous baby themed layout. Mine used photos once again of Lara, this time in the snow.
And finally, tonight the design team lifted a layout by Edleen Maryam. Edleen's layout was lovely but I really struggled to come up with a layout this week. I left it far too late in the week to create my layout but after going to the dentist on Monday and having to have a tooth out , I really didn't feel up to scrapping for a few days. Then the hot, hot, HOT weather we have had this week hasn't helped. With temperatures in the upper 20 degrees I think my Mojo became dehydrated, or maybe it decided to go somewhere cooler. Eventually I managed to put together a layout this morning. I'm not that pleased with it but perhaps it will grow on me.
Here's Edleen's layout, followed by mine.
I used some photos on my layout that we took at Westward Ho!, Devon last summer. We have got in the habit when we go out as a family of taking group photos with the cameras self timer. These photos were taken on the beach with the camera perched on an upturned bucket! The only problem with not looking through the viewfinder of the camera is that I can't always tell if everyone is, shall we say "behaving themselves", when the photo is taken! In these photo Christopher was pulling stupid faces and sticking his fingers in his ears, Steven was either sticking his tongue out or biting Lara's bum (!) and even Wayne joined in by lifting Lara upside down in one of the photos! Ho hum!
Don't forget to have a look at the Mojo Holder blog. As well as being able to see all the design teams layouts there are brilliant sketches on the site prepared by Sarah.
Labels:
BasicGrey,
Mojo Holder,
October Afternoon,
scrapbooking,
Snow Layouts
Subscribe to:
Posts (Atom)


